package cn.mf.cts;
import android.graphics.Color;
import android.os.Bundle;
import android.support.annotation.Nullable;
import android.support.v4.app.Fragment;
import android.view.LayoutInflater;
import android.view.View;
import android.view.ViewGroup;
import android.widget.Button;
import android.widget.FrameLayout;
import android.widget.RelativeLayout;
/**
* CopyRright (c)2018-2028: chanpinxue.cn
* Project: cts
* Module Name: Index
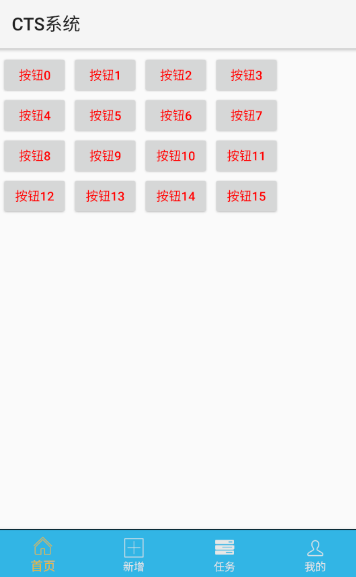
* Comments: 首页
* JDK version used: JDK1.8
* Author: jzh
* Create Date: 2018-09-17
* Modified By: jzh
* Modified Date: 2018-09-17
* Why & What is modified:
* Version: <1.0>
*/
public class IndexFragment extends Fragment {
@Nullable
@Override
public View onCreateView(LayoutInflater inflater, @Nullable ViewGroup container, @Nullable Bundle savedInstanceState) {
View view = inflater.inflate(R.layout.fragment_index, null, false);
// 按钮宽度和高度
int width = 200;
int height = 120;
// 自定义layout组件
RelativeLayout layout = new RelativeLayout(getContext());
FrameLayout.LayoutParams layoutParams = new FrameLayout.LayoutParams(FrameLayout.LayoutParams.FILL_PARENT, FrameLayout.LayoutParams.WRAP_CONTENT);
// 创建16个按钮,每行放置4个按钮
Button arrBtn[] = new Button[16];
int j = -1;
for (int i = 0; i <= 15; i++) {
arrBtn[i] = new Button(getContext());
arrBtn[i].setId(100 + i);
arrBtn[i].setText("按钮" + i);
arrBtn[i].setTextColor(Color.RED);
RelativeLayout.LayoutParams btParams = new RelativeLayout.LayoutParams(width, height);
if (i % 4 == 0) {
j++;
}
btParams.leftMargin = 10 + (width + 10) * (i % 4); // 横坐标定位
btParams.topMargin = 20 + height * j; // 纵坐标定位
layout.addView(arrBtn[i], btParams); // 加入layout组件
}
// 加入view
//this.setContentView(layout);
getActivity().addContentView(layout, layoutParams);
// 批量设置监听
for (int k = 0; k <= arrBtn.length - 1; k++) {
arrBtn[k].setTag(k); // 设置标记
arrBtn[k].setOnClickListener(new Button.OnClickListener() {
@Override
public void onClick(View v) {
int i = (Integer) v.getTag();
System.out.println("按钮" + String.valueOf(i));
}
});
}
return view;
}
}
