import numpy as np
import cv2
import matplotlib.pylab as plt
import matplotlib as mpl
mpl.rcParams['font.sans-serif'] = ['SimHei'] # 指定默认字体为黑体
mpl.rcParams['axes.unicode_minus'] = False # 正常显示负号
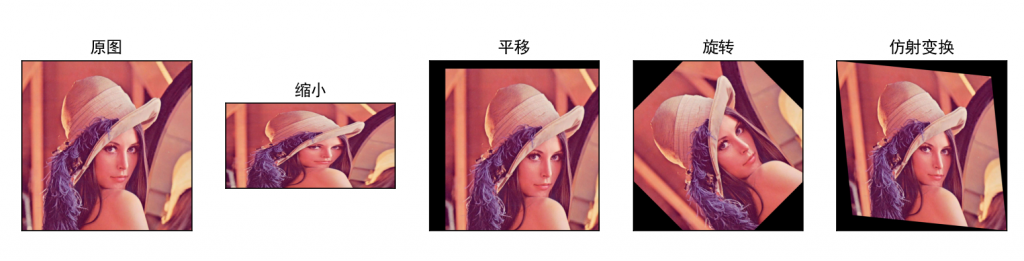
# 原图
img = cv2.imread("lena.jpeg")
img = cv2.cvtColor(img, cv2.COLOR_BGR2RGB)
# 缩小
img_dsize = cv2.resize(img, None, fx=1/2, fy=1/4)
# 平移
# 100 水平方向移动 50 垂直方向移动
M = np.float64([[1, 0, 100], [0, 1, 50]])
width, height = img.shape[:2]
img_move = cv2.warpAffine(img, M, (width, height))
# 旋转
width, height = img.shape[:2]
M = cv2.getRotationMatrix2D((width/2, width/2), # 旋转中心 角度 缩放比例
45, # 角度
1) # 缩放比例
img_rotate = cv2.warpAffine(img, M, (width, height))
# 仿射变换 从一个二维坐标系变换到另一个二维坐标系,属于线性变换。通过已知3对坐标点可以求得变换矩阵。
# 在原图像和目标图像上各选择三个点
width, height = img.shape[:2]
mat_src = np.float32([[0, 0], [0, height-1], [width-1, 0]])
mat_dst = np.float32([[0, 0], [100, height-100], [width-100, 100]])
# 得到变换矩阵
M = cv2.getAffineTransform(mat_src, mat_dst)
# 进行仿射变换
img_tran = cv2.warpAffine(img, M, (width, height))
# 显示图像
# plt.subplot(nrows, ncols, index)
# 表示在当前画布的右上角创建一个1行3列的绘图区域,同时 选择在第 1 个位置绘制子图。
plt.subplot(1, 5, 1)
plt.xticks([]), plt.yticks([]) # 隐藏x和y轴
plt.imshow(img)
plt.title('原图')
plt.subplot(1, 5, 2)
plt.xticks([]), plt.yticks([]) # 隐藏x和y轴
# plt.imshow(blur, 'gray')
plt.imshow(img_dsize)
plt.title('缩小')
plt.subplot(1, 5, 3)
plt.xticks([]), plt.yticks([]) # 隐藏x和y轴
plt.imshow(img_move)
plt.title('平移')
plt.subplot(1, 5, 4)
plt.xticks([]), plt.yticks([]) # 隐藏x和y轴
plt.imshow(img_rotate)
plt.title('旋转')
plt.subplot(1, 5, 5)
plt.xticks([]), plt.yticks([]) # 隐藏x和y轴
plt.imshow(img_tran)
plt.title('仿射变换')
plt.show()
