MQTT(Message Queuing Telemetry Transport):消息队列遥测传输。
一、在Windows搭建mosquitto服务器
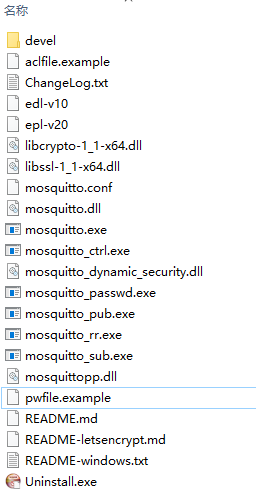
1、下载地址:https://mosquitto.org/download/。最新版本是mosquitto-2.0.0。mosquitto-2.0.2-install-windows-x64.exe。
2、安装路径 C:\mosquitto。

mosquitto.conf:mosquitto服务器的配置文件。
mosquitto:用来开启broker。
mosquitto_passwd:用来设置用户的账号与密码。
mosquitto_pub:用来发布消息。
mosquitto_sub:用来订阅消息。
pwfile.example:通过mosquitto_passwd来存储用户的账号密码的文件。
3、配置文件mosquitto.conf。
配置文件的描述,linux与windows是有区别的。linux路径 /var/log/messages 对应windows路径 c:\var\log\messages。
#设置不允许匿名登录
allow_anonymous false
# 服务绑定的IP地址
bind_address 192.168.124.5
4、重启mosquitto服务,配置文件的修改才能生效。
5、插入新用户名及密码,输入密码时界面是不会显示的,直接输入后回车就可以,需要连续输入两次。保证pwfile.example的路径和上面的配置一致。输入cmd并进入mosquitto根目录输入:
mosquitto_passwd -c /mosquitto/pwfile.example jiangzhihao (使用-c 参数会导致清空密码文件,重新插入用户)
mosquitto_passwd /mosquitto/pwfile.example jzh(不使用-c 表示追加用户,不影响旧用户)
6、创建成功后pwfile.example会出现刚刚添加的用户信息。
jiangzhihao:$7$101$r3XOrWJtvioM2eCr$K66rD+hvIj9DjTXAnodZkdQeqqbSlxETIY7u6wltqcAbYOEkYxvN/6CsGlbJfLqaamw7UK1fZ7Ep4+bEov8GSw==
jzh:$7$101$cafMIcUMLa6GCgT2$1Yn8fE6YOciwAbFQvl2xCpKWqikQ3uq/qr2J79sOFmahpS05gxhnVbwAZJcAqThYl08eg9PMEU4Cjk34wb2W7g==
7、启动mosquitto进行测试。
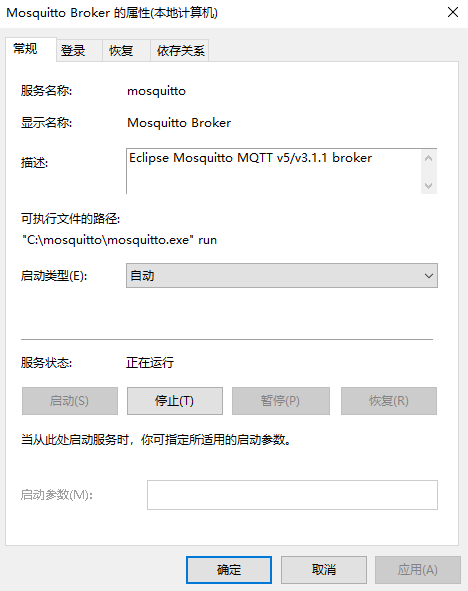
管理工具–>服务启动。

或者cmd窗口启动服务:mosquitto.exe -c mosquitto.conf。

8、订阅、发布(开启两个cmd窗口用于测试)。
mosquitto_sub -h 192.168.124.5 -t mtopic -u jzh -P 111111
mosquitto_pub -h 192.168.124.5 -t mtopic -u jzh -P 111111 -m “hello, jzh”

二、MQTTBox客户端测试
1、MQTTBox下载安装。http://workswithweb.com/html/mqttbox/downloads.html
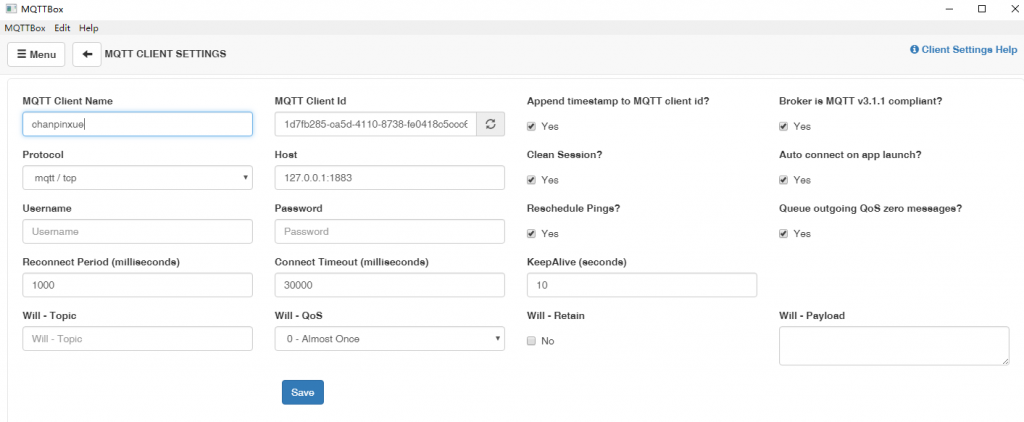
2、建立连接。如果禁止了匿名连接,则需要使用账号、密码连接。注意事项(如果没有在mosquitto.conf配置文件中设置bind_address,则只能本机127.0.0.1进行访问)

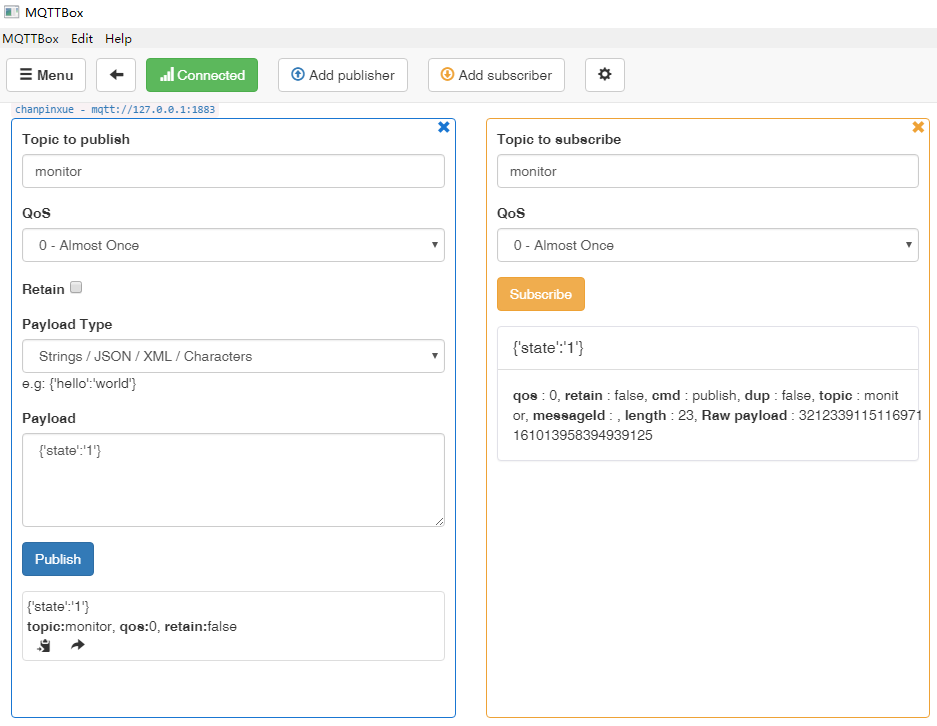
3、设置订阅、发布。

【文档更新】2022-06-16
1、mosquitto-2.0.14升级后与mosquitto-2.0.0的配置差异。①bind_address方法过期,改用listener配置。 ②需要指定password_file。
![]()
mosquitto.conf

allow_anonymous false

# password_file, the plugin check will be made first.
password_file C:\mosquitto\pwfile.example

# listener port-number [ip address/host name/unix socket path]
listener 1883 0.0.0.0
2、如果MQTTBox无法下载,可以使用另一款MQTT客户端,MQTT 5.0 桌面客户端。 https://www.emqx.com/zh/products/mqttx
