关于Python在一个.py文件中调用另一个.py文件的类和函数
1、文件目录结构
2、modle_a目录
bus.py
def add(x, y):
print(‘计算和:%d’%(x+y))
init.py
# 方法1 调用当前文件夹
import bus
bus.add(1,2)
# 方法2 调用当前文件夹
from bus import add
add(1,2)
# 方法3 调用不同文件夹
import sys
sys.path.append(‘../modle_b/’)
impo

1、文件目录结构
2、modle_a目录
bus.py
def add(x, y):
print(‘计算和:%d’%(x+y))
init.py
# 方法1 调用当前文件夹
import bus
bus.add(1,2)
# 方法2 调用当前文件夹
from bus import add
add(1,2)
# 方法3 调用不同文件夹
import sys
sys.path.append(‘../modle_b/’)
impo
<!DOCTYPE html>
<html>
<head>
<meta http-equiv=”Content-Type” content=”text/html; charset=utf-8″ />
<title>Storage测试</title>
</head>
<body>
<h2>Storage测试</h2>
<input type=
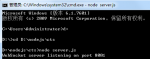
1、下载Node.js,安装node-v10.13.0-x64.msi。
https://nodejs.org/en/
2、安装ws模块。
在cmd命令中输入:npm install nodejs-websocket
3、编写一个server.js文件。
var ws = require(“nodejs-websocket”)
//
var server = ws.createServer(function (conn) {
console.log(“New co
![关于Python数组和矩阵的用法X[:,0]、X[:,1]、X[:,:,0]、X[:,:,1]、X[:,m:n]和X[:,:,m:n]](http://chanpinxue.cn/wp-content/uploads/ta-thumbnails-cache/150x150-u/2018/11/961-1.jpg)
1、关于数组、矩阵的说明。
X[:,0] 取二维数组中第一维的所有数据。
X[:,1] 取二维数组中第二维的所有数据。
X[:,m:n] 取二维数组中第m维到第n-1维的所有数据。
X[:,:,0] 取三维矩阵中第一维的所有数据。
X[:,:,1] 取三维矩阵中第二维的所有数据。
X[:,:,m:n] 取三维矩阵中第m维到第n-1维的所有数据。
2、测试代码
#coding=utf-8
from __future__ import division
#安装
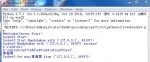
Python、Html5、WebSocket的例子。
1、服务端websocket.py
#coding=utf8
import struct, socket, sys
import hashlib
import threading, random
import time
from base64 import b64encode, b64decode
connectionlist = {}
def decode(data):
if not len(data
Python多个返回值的例子:
#coding=utf-8
# 多个返回值
def cts_info():
user_code = ‘9001’
user_name = ‘jzh’
# 元组-可以包含多个数据,因此可以使用元组让函数一次返回多个值
# 如果函数返回的类型是元组,小括号可以省略
# return (user_code, user_name)
return user_code, user_name
# 元组
result = cts_inf
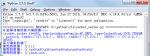
1、server.py
#coding=utf-8
# 测试Socket
import socket
server = socket.socket()
#初始化
ip_port = (‘127.0.0.1’, 8081)
server.bind(ip_port)
#绑定ip和端口
server.listen(10)
#监听,设置最大数量是10
print(“开始等待接收客户端数据—-“)
while True:
conn, addr = s
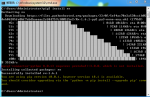
1、通过pip在Python中安装RxPY的library。
在cmd命令中输入:pip3 install rx
2、测试代码
# 测试RxPY
# 1
from rx import Observable, Observer
def push_five_strings(ob):
ob.on_next(“蒋”)
ob.on_next(“智”)
ob.on_next(“昊”)
ob.on_next(“来”)
ob.on_next(“了”)
ob.
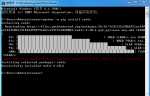
1、通过pip在Python中安装Redis的驱动程序。
在cmd命令中输入:python -m pip install redis
2、测试代码
#coding=utf-8
# 测试Redis
import redis
# 连接redis,加上decode_responses=True,写入的键值对中的value为str类型,不加这个参数写入的则为字节类型。
# 连接池方式
pool = redis.ConnectionPool(host=’localho
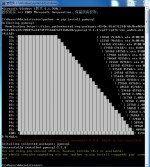
1、通过pip在Python中安装SQLServer的驱动程序。
在cmd命令中输入:python -m pip install pymssql
2、建立数据库以及测试表。
–drop database test;
create database test;
use test;
create table app_users (
user_id int identity(1,1) not null,
user_code varchar(60) not nul
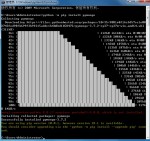
1、通过pip在Python中安装MongoDB的驱动程序。
在cmd命令中输入:python -m pip install pymongo
2、测试代码
#coding=utf-8
# 测试MongoDB
from pymongo import MongoClient
conn = MongoClient(‘127.0.0.1’, 27017)
# 连接cts数据库,没有则自动创建
db = conn.cts
# 使用user集合,没有则自动创建
1、下载Connector/Python 8.0.13。mysql-connector-python-8.0.13-py3.7-windows-x86-64bit.msi。
https://dev.mysql.com/downloads/connector/python/
2、如果没有安装.NET环境,安装Connector/Python 8.0.13,会出现提示This application requires Visual Studio 2015 Redistributable,此时
#coding=utf-8
# 定义一个函数 sum_num
# 能够接收一个 num 的整数参数
# 计算 1 + 2 + … num 的结果
def sum_num(num):
# 递归的出口,当参数满足某个条件时,不再执行函数
# 1. 出口
if num == 1:
return 1
# 自己调用自己
# 2. 数字的累加 num + (1…num -1)
# 假设 sum_num 能够正确的处理 1…num – 1
temp
#coding=utf-8
a = 5
b = 77
# 解法1:使用其他变量
# c = a
# a = b
# b = c
# 解法2:不使用其他的变量
# a = a + b
# b = a – b
# a = a – b
# 解法3:Python 专有
# a, b = (b, a)
# 提示:等号右边是一个元组,只是把小括号省略了
a, b = b, a
print(a)
print(b)
#coding=utf-8
# 全局变量
gl_site = “idodo”
def demo1():
# 希望修改全局变量的值 – 使用 global 声明一下变量即可
# global 关键字会告诉解释器后面的变量是一个全局变量
# 再使用赋值语句时,就不会创建局部变量
global gl_site
gl_site = “chanpinxue.cn”
print(“demo1 ==> %s” % gl_site)
def demo2():
#
1、file.jsp。
<%@ page language=”java” contentType=”text/html; charset=UTF-8″ pageEncoding=”UTF-8″%>
<html>
<head>
<meta http-equiv=”Content-Type” content=”text/html; charset=UTF-8″>
<title>文件上传</title>
&
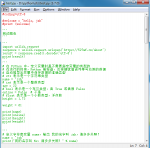
Python基础语法。注释、变量定义、输入、输出、判断、循环、函数、列表、元组、字典等。可以通过Python默认编辑器IDLE进行调试。
#coding=utf-8
#welcome = “hello, jzh”
#print (welcome)
”’
测试爬虫
”’
”’
import urllib.request
response = urllib.request.urlopen(‘https://chanpinxue.cn/about’)
JNDI lookup for name [spring.liveBeansView.mbeanDomain] threw NamingException with message: Name [spring.liveBeansView.mbeanDomain] is not bound in this Context. Unable to find [spring.liveBeansView.mbeanDomain].. Returning null.
错误原因:
spring-con
1、urllib.request
#coding=utf-8
#welcome = “hello, jzh”
#print (welcome)
”’
测试爬虫
”’
import urllib.request
response = urllib.request.urlopen(‘https://chanpinxue.cn/about’)
result = response.read().decode(‘utf-8’)
print(result)
2
1、jQuery.php
<!DOCTYPE html>
<html>
<head>
<meta charset=”utf-8″>
<title>jQuery</title>
<script src=”jquery-3.3.1.min.js”></script>
</head>
<body>
<script type=”text/jav