树莓派安装编译opencv

一、python2.7
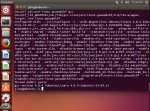
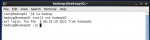
出现以下错误,则需要更换源。
nano是ubuntu系统自带的编辑器。
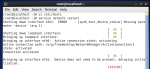
#更换更新源和下载源
sudo nano /etc/apt/sources.list
#更换镜像 按ctrl+x进行保存退出
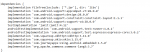
deb http://mirrors.ustc.edu.cn/raspbian/raspbian/ buster main contrib non-free rpi
deb-src http://mirrors.ustc.edu.cn/rasp